If you’ve decided to erase a tattoo, chances are you’ve opted for laser tattoo removal, the most effective method available. While it’s highly efficient, the process can leave you with some temporary side effects, such as blisters. Understanding and managing these blisters is crucial to ensure your skin heals properly and achieves that clear, ink-free look you desire.
Table of Contents
Introduction to Laser Tattoo Removal
Laser tattoo removal uses concentrated light beams to break down the ink particles in your skin. Over time, your body’s immune system then flushes out these fragmented particles, gradually fading the tattoo. Although it sounds straightforward, the process involves multiple sessions and can be uncomfortable, leading to temporary side effects like swelling, redness, and, most commonly, blisters.
Laser tattoo removal is popular because it’s precise and effective. However, it’s essential to know that the body’s natural response to the laser treatment can vary, making aftercare a critical part of the process. Let’s explore why blisters occur and how you can manage them effectively.
Understanding Blisters in the Context of Laser Tattoo Removal

Blisters form as a result of the body’s natural healing process. When the laser targets the ink, it generates heat, which can cause the surrounding skin to react. According to a laser specialist, “Understanding the skin’s reaction post-treatment is crucial. Blisters can be a common, albeit temporary, side effect of laser tattoo removal.”
The formation of blisters is your body’s way of protecting the underlying skin while it heals. These fluid-filled pockets help cushion the affected area and prevent further damage. However, knowing how to handle these blisters can make a significant difference in your recovery.
Managing Blisters

Managing blisters properly is essential to minimize discomfort and reduce the risk of infection. Here are some expert-recommended steps:
- Keep the area clean:
Gently wash the blistered area with mild soap and lukewarm water. Pat it dry with a clean towel.
- Apply an ointment:
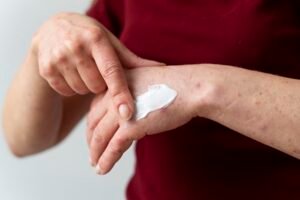
Use an antibiotic ointment or a specialized aftercare product to keep the area moisturized and prevent infection.
- Cover it up:
Protect the blister with a sterile bandage to avoid friction and exposure to bacteria. Change the bandage daily or whenever it gets wet or dirty.
Dermatologist insight emphasizes that “while the formation of blisters can be alarming, it’s an indicator that the skin is responding to the laser. Managing them with gentle care, such as keeping the area clean and moisturized, is key to ensuring the best cosmetic outcome and avoiding scarring.”
Timeline of Recovery

Understanding the recovery timeline can help you anticipate what to expect after each laser session. Here’s a typical breakdown:
- First 24 hours:
You may experience redness and swelling. Blisters can start forming within this period.
- Days 2-3:
Blisters become more noticeable and may feel tender. Continue with diligent aftercare.
- Days 4-7:
Blisters should begin to dry out and form a scab. Avoid picking or popping them.
- Week 2:
The scabs should start falling off naturally. Your skin may still feel sensitive but will show signs of improvement.
Remember, everyone’s skin reacts differently, so your timeline might vary slightly. If you notice any signs of infection, such as increased redness, pus, or fever, consult your healthcare provider immediately.
Preventing Blisters

Prevention is always better than cure. Here are some tips to help you avoid blisters during and after the laser tattoo removal process:
- Follow pre-treatment guidelines:
Avoid sun exposure, tanning, or using self-tanning products on the area to be treated. Wear loose, comfortable clothing to your appointment to reduce friction post-treatment.
- Hydrate your skin:
Well-hydrated skin is more resilient. Drink plenty of water and use a moisturizer in the days leading up to your session.
- Use recommended aftercare products:
Aftercare experts advise, “In our experience, we’ve seen great results when clients diligently follow the recommended aftercare routine. This includes using the right ointments and not picking at blisters, which can lead to infection and prolong the healing process.”
Case Studies and Testimonials
Hearing from others who have gone through the process can be reassuring. Here are some real-life examples:
Emma’s Experience:
“I was nervous about the blisters, but following the aftercare instructions made all the difference. The blisters subsided within a week, and my skin healed beautifully.”
John’s Journey:
“I had blisters after my first session, but I made sure to keep the area clean and used the ointment my specialist recommended. The healing process was smooth, and I’m happy with the results.”
Sophia’s Story:
“Initially, I was worried about scarring, but the blisters were manageable with proper care. My skin is now clear, and I’m thrilled with the outcome.”
These testimonials highlight the importance of proper aftercare and following expert advice to achieve the best results.
Conclusion and Next Steps
Blisters are a common part of the laser tattoo removal process, but they don’t have to be a source of worry. By understanding why they occur and how to manage them, you can ensure a smoother recovery and better results. Remember to follow the expert guidance provided and take proactive steps to care for your skin.
If you’re considering laser tattoo removal or are currently undergoing the process, we encourage you to explore our [Tattoo Aftercare Guide] for more detailed information. Additionally, our team of specialists is here to support you every step of the way. Feel free to reach out with any questions or concerns you may have.
Your path to clear, ink-free skin starts with understanding and proper care. Take the next step in your tattoo removal journey with confidence and knowledge.

